Showing posts with label 40k terrain. Show all posts

Wednesday, November 12, 2014

Chaos Wasteland

The Da Boyz GT is almost upon us and I have been very busy these past few weeks finishing up my latest terrain project for the GT. Each year the Da Boyz encourages attendees to bring their own tables to the GT so that there is a large variety of unique and stunning terrain and as an added bonus they have even turned it into a contest where the players get to vote on their top 3 favorite tables and prizes are awarded to the top three selected. Each year I try to create a new table or theme to bring along and share with the community. Last year was my Tyranid/Jungle table, which got a lot of positive feedback from attendees. This year I decided to go the route of a blasted chaotic landscape. So let's take a look at the latest project.


Monday, September 29, 2014

Desert Ruins Terrain

This coming Saturday (October 4th) will be the first ever Beef and Wing Brawl being held in Buffalo NY. (I do believe that there is still openings available and I do believe that walk-ins are welcomed as well. Check their site for full details.) As I've wrote about in past postings, these are a great group of guys who have really made strides in promoting the gaming community in the Buffalo area. When they first brought up the idea of putting on an event in Buffalo I quickly offered to bring any terrain I had plus I'd be willing to make more. So over the course of the past month or so while I was working on the swamp terrain I have also been working on two tables worth of new terrain for the event and you are about to see the results of the Desert Ruins terrain. I'll be showing all of the pieces at once rather than the piece by piece sections like I have in the past so that I can devote next weeks post to the results of the Brawl. So let's take a look at what I came up with for the Desert Ruins.


Tuesday, September 23, 2014

Swamp Terrain - The Silent Watcher

Here is the latest addition to my swamp board terrain. Like I did with the pillars in last week's blog post I wanted to try my hand at creating the look and feel of the environment slowly reclaiming man made structures. If you google search jungle ruins more than likely you will come across a picture of some ruins with trees growing on top of the structure and like with the pillars I wanted to make a tree growing on top of a giant skull structure. So let take a look at how I created this piece.


Monday, September 15, 2014

Swamp Board Terrain - The 3 Pillars

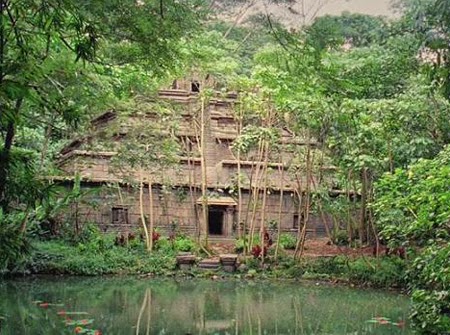
I have completed another piece of terrain to go along with the swamp board theme and I've aptly named it the 3 pillars because, well it has 3 pillars on it. Rather than go into details of how I made the pillars I'll refer anyone who may have missed the post where I created a piece called the Sentinel. You can see how I made the pillar here. This is a much larger piece than the last ones and I've incorporated a tree which has its roots growing out and over the ruins, much like you see in images of temple ruins in Southeast Asia. Recently I purchased some Hirst Arts molds to create blocks and tiles to make it easier and quicker to knock out terrain pieces rather than making the blocks by hand. In this project I've started to incorporate some of those blocks into my terrain. So lets take a look at how I created the 3 Pillars.

Wednesday, August 13, 2014

Swamp Board Area Terrain

 Realistic Area Terrain


In my last post I had created some simple ruins to use as area terrain, obstacles, and areas of cover. As a continuation of that theme I have finished up working on areas of vegetation, fallen logs, and large boulders that infantry sized models can hide behind for cover and also add to the overall aesthetic of the board. So lets look at the steps involved in creating the areas of vegetation terrain.


Thursday, July 3, 2014

Swamp Terrain - Simple Ruins

Now the that bulk of the playing surface is finished I have started working on the modular terrain pieces that will inhabit the playing field. Since I will be working on multiple projects at the same time I figured it would be easier to document and create the step-by-step instructions for each theme rather than throw a whole slew of different projects into on post. So in this series I wanted to create a "simple" set of ruins. What I mean by that is that these will be just a series of small walls that may have once been a part of a wall or a series of small structures that have fallen apart over time and suffered the ravages of time. So without making you wait anymore, let's see how I went about creating the simple ruins.


Friday, June 20, 2014

Swamp Board - Base Complete!

As the title says, I pretty much have finished with the base board of the project with the exception of adding the water. (That will come once all of the flock finishes drying) So at this point I think it's safe to say that I can now move onto the stage of building out the modular terrain pieces that will be going on top of the board and provide cover and obstacles for the armies. So let's take a look at the final steps for creating the base of the board.


Tuesday, May 27, 2014

Swamp Board - Painting has begun

As stated in the title I have been spending the last two weeks painting up the surface of the swamp table. I also started to add debris and plant growth to the bottom of the waterway so that when the water effects have been poured in you will be able to see pieces of trees, rubble, and plant life. So let's take a look at the progress so far.


Wednesday, May 7, 2014

Swamp Board Update


The past two weeks have been pretty busy with Spring coming around to New York but I was able to squeeze in some time to work on my swamp board. I learned an important lesson while working on the next phase and that is not to compromise your projects by using cheaper materials. If you remember in my last post I left off with me gluing the plastic tiles to the board. Well, I ran out of my glue so I ran to a local hardware store instead of Home Depot and the only wood glue they had on the shelf was Elmer's wood glue. I have always used Tite-Bond in all of my previous projects (and have always had great success with it) but I didn't want to hold off on my progress so I picked up the Elmers. Sure enough, after I finished gluing all 400+ tiles, some of them started to pop off as I was wiping away the excess sand. So I tossed the rest of the Elmer's away and made another trip to pick up some more tite-bond.  So let's see where I am with the project right now.


Tuesday, April 15, 2014

Born on the Bayou
I've made more progress on the swamp board over the past week. While I am getting a lot of things done on the board, the pace may seem a little slow since so much of the time is spent letting glue dry between applications. But fear not, things are progressing and starting to take shape. So without dragging this out, let's take a look at what I was able to accomplish this past week.


Tuesday, January 14, 2014

Custom Skimmer and Jet Bike Bases

Back towards the end of 3rd edition, when I bought my first  Tau Devil fish, I wasn't that far along into the hobby and did not know about conversions or making custom bases and such. Like most people, I assembled my model, painted it and then added sand and flock to the clear skimmer base and then I was ready to play with my new model. After a few games of playing with the devil fish, the tip of the clear plastic rod that inserts into the bottom of the skimmer snapped off inside of my devil fish. I  was forced to drill out the bottom of the skimmer base so that I could insert a new plastic rod but then that soon broke off as well. That's when I knew that I would have to come up with a better solution.


Tuesday, January 7, 2014

Building a Portalglyph

The Warhammer 40k Daemons of Chaos book has a unique item that you can take from the Exalted Rewards section called a portalglyph. Basically, once dropped on the board it allows the daemon player the potential to "summon" in new daemonic troop choices (i.e., bloodletters, daemonettes, plague bearers, or pink horrors) to the battle field. I liked the idea of using this piece of war gear but GW never made a model or issued a template for users to represent the portalglyph. Instead the codex/army book simply states to use a small blast template or something similarly sized. Well, I for one saw this as a challenge to make my own portalglyph instead of tossing a blast template on the table. So let's take a look at how I built my portalglyph.


Tuesday, October 8, 2013

Tyranid Spires Pt 1 and DaBoyz GT Tau List

Grubnards GT Countdown T-6 Weeks

This week I thought I would showcase part 1 of the Tyranid Spires terrain that I have been working on for a good part of the past month. This portion of the project was much more difficult than the other terrain pieces since I was working with new material and did not know what to expect. I will be breaking up the project into two part, this week focusing on the initial stages of development and next week I'll wrap it up with the final results. This weekend is also the Da Boyz GT primer being held at Millennium Games and Hobby so I plan on bringing the full set of the Tyranid terrain and see how it holds up before next months GT.


Tuesday, September 24, 2013

The Court of the Scarab King

Grubnards GT Countdown T-8 weeks

Wow, only 8 weeks until the GT and there is still a lot to do.  Time seems to go by fast when you are gearing up for a big GT. This past week I took the plunge and started working on a new table that I will be bringing to the GT this year, along with my Tyranid terrain and ancient ruins terrain. Besides finishing painting my army I still need to finish painting up the last of my Tyranid terrain, build a display board for my Tau, and build my new necron table, or as I am referring to as, the Court of the Scarab King. It has a nice ring to it, eh?

Now due to time constraints of gearing up for the GT and trying to type up my how-to series on terrain, I am only going to focus on work in progress shots for the necron terrain now and then once the GT is done I'll go back and type up the steps I used to create the necron terrain. So for now onto the pics....

Tuesday, August 13, 2013

Tyranid Terrain: Ripper Pads Finished!

After a month of working on this project and a plethora of other projects I was finally able to finish the tyranid ripper pads. Unlike with the first two  projects (the digestion pools and carnivorous plants)  I started to incorporate elements of human habitation to give the terrain a story theme. So in this project I used a section of the crashed ship pieces that came in the BfM 4th edition starter set and I made a small section of an imperial generator room. I plan on continuing this theme with the remaining pieces that I am going to work on for the tyranid terrain. So with out any more delay, lets looks at the pics!

Tuesday, July 2, 2013

Tyranid Terrain: Ripper Pads


Tyranid rippers are small organisms created to spawn in the latter stages of a tyranid invasion for the sole purpose of consuming all matter on the surface of the planet. When they cannot eat anymore matter they immerse themselves in the many digestion pools to be broken down and digested, along with all matter that they have consumed, and sucked back up by the hive fleets so that the DNA can be assimilated by the fleet. In this series I wanted to create one of the many ripper pads that spawn on the surface of the planet during an invasion. I wanted to make these pieces large than the previous tyranid terrain projects and I also wanted to include imperial elements in the terrain as wreckage that has been overrun by the invasion. So without any further ado, lets get started.

Tuesday, June 18, 2013

Tyranid Terrain: Carnivorous Plants Conclusion

In my last article, I left off with the basic egg-shaped pod with the tyranid ribbing drying with a mixture of white glue and super glue. Since then I have painted up the pods, added jungle foliage, and flocked the bases. As I did this process over a series of 10 days, I was not able to take pictures of each step but I've included the final images for you to review.


Tuesday, June 4, 2013

Tyranid Terrain: Carnivorous Plants pt II

Welcome back to the next installment on making tyranid terrain. This latest series is about creating carnivorous plants that will be part a part of a tables worth of terrain that represents the later stages of an Tyranid invasion. Last week I started the project by gluing some foam eggs to particle board and adding feeder tendrils to the base of the pods. You can read about that phase by clicking here. This week I did some clay sculpting to add an alien look and feel to mirror the digestion pools I worked on a few weeks ago (click here). So let's take a look at what I was able to add this week.


Wednesday, May 29, 2013

Tyranid Terrain: Carnivorous Plants and More

This past week has been a real productive one for me in regards to hobby-related projects, which is a good thing because my hobby time these past few months has been pretty hit and miss. Here is a run down of what I was able to accomplish in the past week. First I was able to pick up Betrayer by Aaron Dembski Bowden. As a huge fan of Aaron's writings and the Word Bearers I was pretty stoked to start reading this book. I am about half way through the book and it has so far exceeded my expectations. While the book does deal with the Word Bearers and their actions going on at the same time as the events in Know No Fear, it deals more with the World Eaters and their involvement in the campaign against the Ultramarines. For someone who did not know much about the World Eaters I find this book interesting as it fleshes out Angron and Kharn (especially Kharn) as characters that you can somewhat feel for. One of the best lines in the book comes right from the opening pages, as a quote from Kharn: "The wolves will always come to heel when called. In that regard, it is a mystery why they name themselves wolves. They are tame, collared by the Emperor, obeying him at every whim. But a wolf doesn't behave that way. Only a dog does. That is why we are the eater of worlds, and the War Hounds no longer." - Eight Captain Kharn. - Excerpt from Betrayer.

Tuesday, May 21, 2013

Tyranid Terrain: Digestion Pools Pt III

In this article I will wrap up the series on a tyranid digestion pool. Looking back at the first two articles I am pretty pleased with how building these pools have gone. As I mentioned in the first article, I was kind of apprehensive about building tyranid terrain as it was something out of my comfort zone. I did a lot of experimentation and there were plenty of trial and error going on during the process but overall I am pleased with the final product and I am ready to move onto the next project. But before I get ahead of myself, let's wrap up the digestion pool tutorial.

In the first article I built up the borders of the digestion pool and in the second article I added the poisoned fronds and the gooey inside walls of the pool. In this article I will be adding the vegetation to the bases and paint up the pool.