
Step 1:
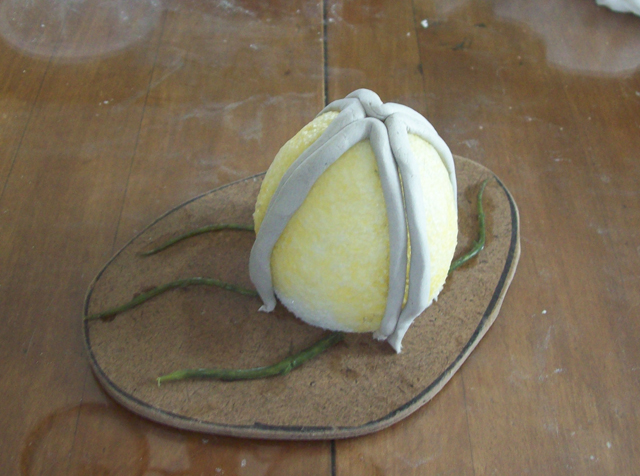
I cut off a chunk off air hardening clay and rolled it into a long rope roughly the same thickness of a pencil. This would serve to create the effect that the plant pod is able to "open up" just like the eggs from the Alien movies.

Next I draped a section of the clay rope over the indentations I made last week with the pencil.

I repeated this process to cover all 4 sides of the pod.
(It is important to note that when working with clay, it helps to store the pieces you are not using at the moment, in a moist towel as this helps prevent the clay from starting to dry out while you are working on other pieces. I also keep a small cup filled with water to dip my fingers in to keep the clay moist.
Step 2:
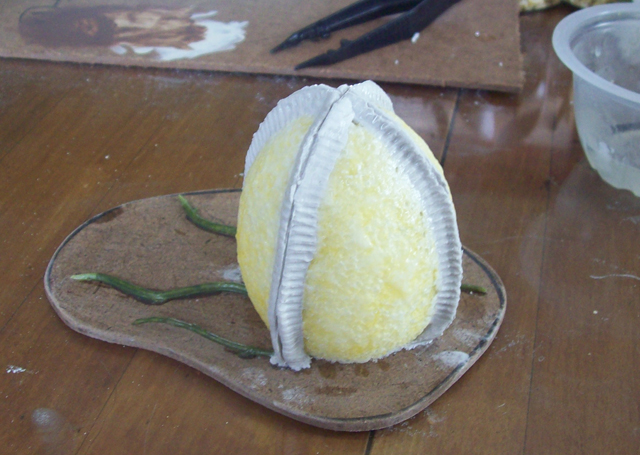
After the clay sections were in place I wetted my hands and crimped the clay sections together so that they started to merge.

Then, placing my thumb and fore finger together, I slid them along the clay sections until it formed a crest. It was important that I kept my fingers wet in this process so that they clay sections fused together seamlessly. Now we are ready to add the alien effects.

As I did with the digestion pool, I took a section of ribbed tubing and pressed it into the sides of the crest and gently rolled it back and forth to create a ribbed texture.

I then repeated this process on each side.

Again, it is important to periodically wet the ribbed tube so that the clay does not stick in the ribbing.
Step 3:
While the clay is still moist and flexible, I took the back edge of a razor blade and made a line down the middle of the crest.

When done it looked like this.
At this point some of the lines fell back in a little due to the weight of the wet clay but that is ok. We will be cleaning that up after the clay dries.
Step 4:
I let the clay sit for 48 hours to make sure that it dried out and hardened as I did not want it to crack or flake off during the sanding stage. During this stage I took a section of fine sand paper and ripped off a 4x4 inch square. I folded the sandpaper so the I could have a fine edge that was rough on each side. I then gently sanded down the lines I cut with the razor blade. This helped to smooth out the folded edges that formed while the clay was wet and it also allowed me to create a deeper line. I also used the sand paper to add some depth to the ribbing created by the tube.

Step 5:
After I finished sanding all 4 of the pods, I took some of the plastic vines I used in the first step and inserted them into the top of the pod to represent tendrils waving in the wind, waiting for some unfortunate prey to walk by. Then I added some sand to the base.


Next week I will be applying the white glue/super glue effect along the seam where the clay and the foam meet, similar to what I did for the digestion pool.

Then I will paint up the pods, add additional flora and flock the bases.
This week I will also be finalizing some additional ruins to go with the set I gave to Hyv3 Mynd for his jungle board. I will also be attending a random partner event at Millennium Games on Saturday. The format is that you bring a list worth 1000 points and then for the first match you are randomly assigned a partner and play two other players. In rounds two and three the top players then get paired with the bottom players so that each team should be on equal footing. This is always a fun event and is a great way for new players to get a feel for how tournaments work. I'll include a brief write up along with the final part of the carnivorous plants article next week.
What's frustrating about this is that I fully intended to foolow some of your techniques with my own Tyranid Bastion but because I couldn't get the ribbed tubing promptly forgot all about it. I've been sculpting my 'ribs' individually with a sculpting tool. They've come out OK, but not quite in your league of bio-mechanical Geiger-esque growths. Still, I'm trusting that some extra detailing and the eventual paint-job will raise the bar on my servicable sculpting.
ReplyDeleteBelieve it or not I got that tubing from my son's old Space Cops lego set. It only came out 2-3 years ago so if you know someone who collects Legos you should be able to track it down. Some of the smaller Star Wars or Marvels sets may have it as well.
DeleteI like it because it is small and flexible, allowing you to make nice effects.
Good luck tracking it down!
Looking great!
ReplyDeleteThey're looking pretty good. The tendrils really help give it a lively look.
ReplyDeleteI'm not sold on the ribbing along what I assume are the plant-leaf seams though. I think maybe its rarer to see "ribbing" like that in natural plant life.
I thought the depressions from the pencil marks before were pretty good. Alternately, the molded lips with less of a "ribbing" may also look more organic? Not very helpful, I know.
Can't wait to see them finished up!
great job with the terrain as always kevin, I will keep these in mind whenever I need to build a tyranid table or display for my alien-nids
ReplyDeleteI love the Tyranid Terrain!
ReplyDelete